Practically Using Finterp And Vinterp To Make A Widget Follow Our Mouse (With Smooth Interpolation)
Would be great if you could just tell a Widget to go where you want it to go - and it would just work?
Well, we'll do exactly that.
Interp your way to the top
Lets start simple by Creating and adding a widget to the viewport
Then, we'll drag and drop an Image Widget into our Canvas Panel.
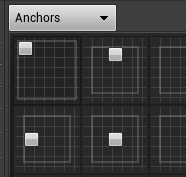
In the Details Panel, make sure the Anchors of the Image are set to the top left corner option.
Background: fInterp To
Let's create one of the Stars of the day - the "fInterp To"-Node

What it is capabe of is interpolating a Current Value Towards a Target Value, using the distance between the Positions as a kind of a multiplier for the speed, hence creating a kind of an easing effect for our movement. Everytime we call the node, it interpolates one Step further towards our desired Value, and Returns the New Value.
Setting it up
For the node To work in our intended way - following our mouse cursor - we need it to update continuously, as we want to be able to move our cursor frely and expect the image to follow responsively. So - we use the Event Tick. For a less Performance-heavy Version we can also use Timers: A better Event tick? . All the InterpTo Nodes work a lot smoother on Event Tick, though.
The Event Tick also solves one of our Inputs instantly, providing a Delta Seconds Output (though for other Cases we can always just get the world delta seconds via a built-in function)
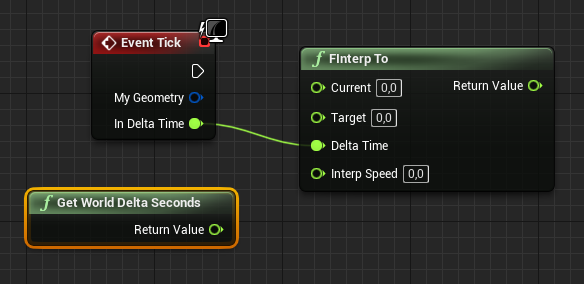
As we want our Current Value to be fed into the Node, brought closer to the Target and then to repeat the procedure, we create a Float Variable for it and get it as well as set it after the alternation.
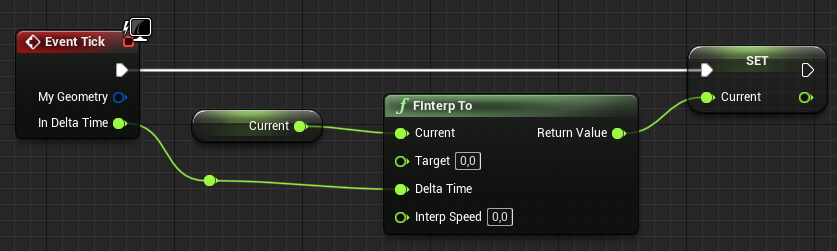
Then what is missing is our Target, as well as our interpolation speed.
The Interpolation Speed.
It will define The Speed in which your Value will be interpolated towards your Target.
I would recommend to treat the Interp Speed as a fantasy Value and just eyeballing and testing different values to find the fitting one for your Use-Case.
If your curious how the interpolation works, though, let's have a short excursion:
The Delta Time multiplied by the Interp Speed is translated to a value between 0 and 1.
This Value is then Multiplied by the Distance of the Current Value to the Target.
Finally the result of that is added to the Current Value specified and then Returned to us.
With the Delta Time not being really Constant, this is a really tough thing to calculate beforehand, hence my recommendation - but you do you. We'll just use 3 for this Example.
You can also always modify this speed at runtime.
Setting our Images Position
Before coming to our Target, we have to make sure our Image can be moved by our Construction. To Do that we can Drag and drop the Image from our Variables Panel into our Graph. We choose "Get".
If we now try to get anything Position related, nothing useable will show up.
That's because the Image in itself doesn't have a Position - it only has one relative to it's parent. Thats how stuff works in Unreal. It really takes a while to get behind that and will cause headaches, but eventually things tend to work out.
As our parent is a Canvas Panel, we can get the "Canvas Panel Slot" in which our Image sits. If we pull out a string from there, we can get the Position easily.
Now we can just use our Returned "Current Value" and feed it into the Y-Position of our Image.
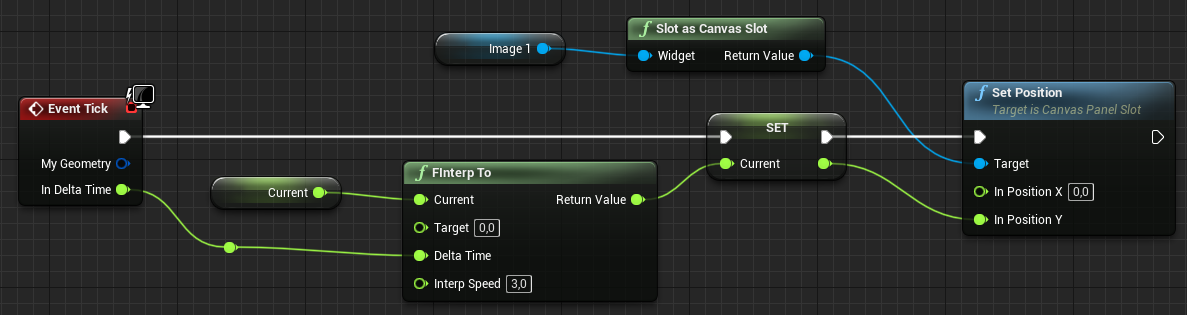
The Target
Now the only missing piece is our Target.
To try if we setup everything in the right way, we can now just type a Value betwen 0 and our Viewport Y Size in Pixels as Target, and just press Play.
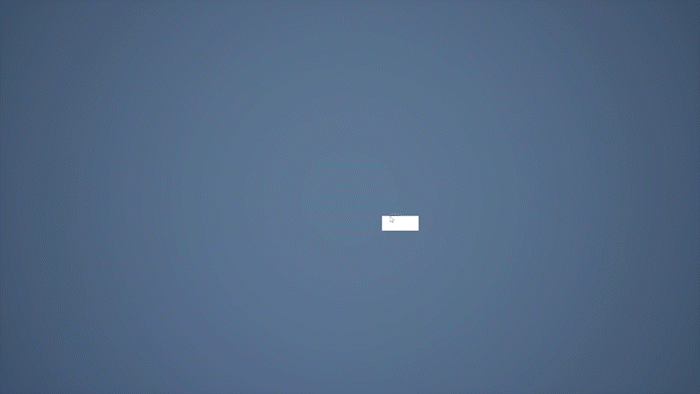
The Image should now interpolate towards our specified Pixel position.
If you don't see anything, maybe put the Interp Speed down to 1 or below. Now you should be able to recognize what happens.
Come on little Image, follow our mouse!
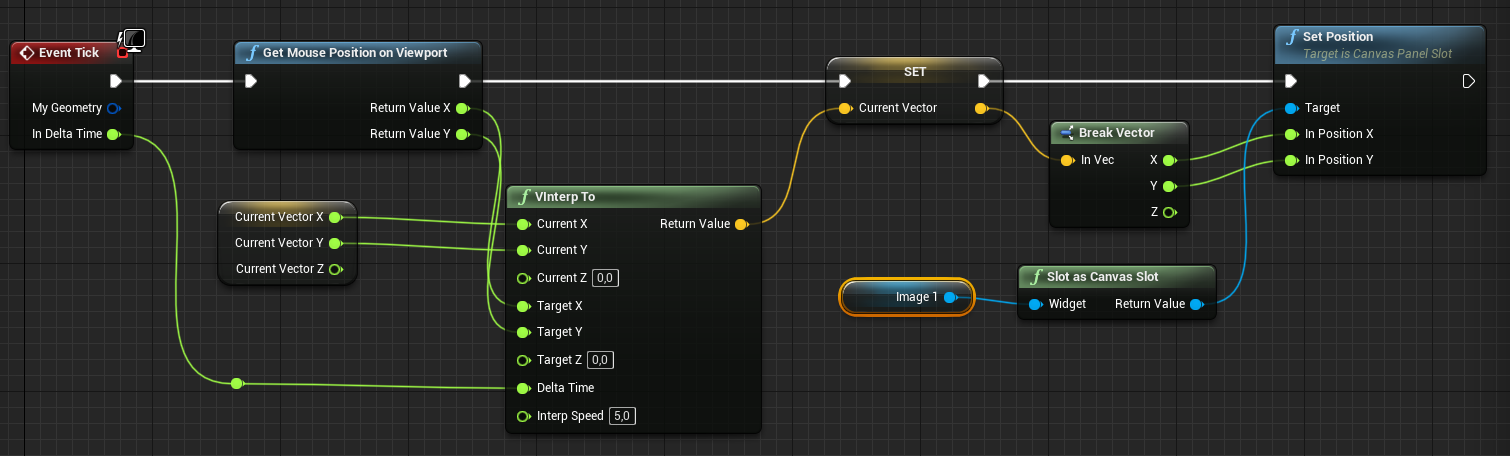
Now the only thing left to do is using our Mouse Position to drive the interpolation Target.
Fortunately, there is a node for that.
Its called "Get Mouse Position on Viewport"

We can just use the Y Position as is - and the Widget will now follow our Mouse Cursor height with that little amount of Delay that just feels good. If it doesn't, try adjusting your Interp speed to very high and very low values and find your favourite.
Trust me: It's a whole lot of fun!
But, what if I want it to follow X, too?
You could always just do a second fInterp for the X-Position- BUT:
The really nice thing about fInterp is, that there's also a vInterp for Vector3's, a tInterp for whole Transforms, and a rInterp for Rotations. And they all work the Same way.
For our Use-Case I would recommend using vInterp while completely ignoring the Z-Value.
With a right click on the vector Input or Output you can just Split it and achieve our desired effect in no time. Have Fun!